Happy spring cleaning season! As we prepare to welcome warmer weather and the change of season, many of us will feel the itch to remove clutter and freshen up our homes.
In fact, according to the American Cleaning Institute, more than 75 percent of Americans say they engage in a spring cleaning exercise every year.
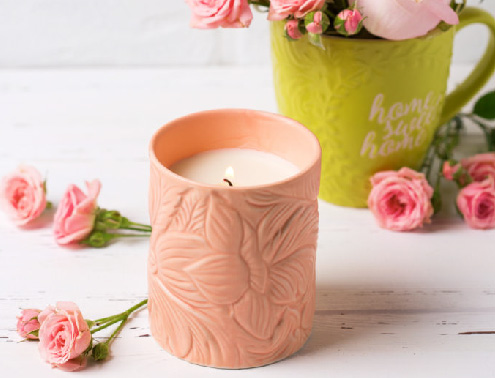
While lighting a candle is a great way to conclude a deep cleaning session, there’s a good chance that your collection could use a little freshening up too. As you begin clearing out your closets and updating your décor, add candle cleanup to your list.
Place and store candles wisely
With their pleasant aromas and complementing colors, it’s no surprise that candles are frequently used as a focal point for home décor. When using candles throughout your home, always remember that placement makes all the difference.
Avoid displaying your candles in a spot where they will be directly exposed to sunlight or harsh indoor lighting. Candles may fade or melt if they are left in bright light or exposed to heat for an extended period of time.
Ready to start swapping your pine-scented candles for fresh florals? Store candles in a cool, dark and dry place until next season.
This will keep them clean of dust and debris, and can also help protect the wax and fragrance. Also, don’t throw away the lids to your candles. They help protect them!
Ditch the candle drippings
Candles are a great way to create a relaxing ambiance, but candle wax stains can be not-so-soothing.
Did wax drip on your favorite table cloth at your last dinner party? Put the table cloth in the freezer for about thirty minutes. Next, scrape off the cold wax. Then place a paper bag over the wax. Put your iron on a low heat setting and run it over the bag on top of the stain. The wax will slowly be absorbed by the paper bag. Finish by applying a dab of laundry detergent directly to the stain before washing.
Trying to clean out melted wax from your votive candle holders? Luckily, there’s a quick fix. Place the candleholder in the freezer for an hour or so. This allows the wax to shrink and easily pop off when the candleholder is removed from the freezer. Another word to the wise: never use a knife or a sharp object to remove wax drippings from a glass votive holder. This can scratch or weaken the glass and may break your candle.
Votive holders can clean more easily afterward if you add a few drops of water to the glass before inserting the tea light candle. Only use the water-drop method if you’re planning to burn the candle immediately afterward, and don’t add more than a few drops! Over time, a candle wick could absorb the water and won’t burn properly.
Polish to perfection
Many household items can collect dust and fingerprints over time, and candles are no exception. Clean your candles by gently rubbing the surface with a piece of nylon or a soft cloth. You can use a dry cloth, or one that’s slightly dampened with water.
Don’t stress about soot
The small amount of soot produced by a candle is the natural byproduct of incomplete combustion and is not a health concern. Candle soot is similar to the soot given off by kitchen toasters and cooking oils and is chemically different from the soot formed by the burning of diesel fuel, coal, or gasoline.
While you shouldn’t be worried about candle soot, there are a few ways to reduce it. Trim the wick to ¼ inch before every use to promote proper flame height.
Additionally, place the candle away from drafty areas to avoid flame flickering, and ensure that the wax pool is free of debris. This will also help prevent those unsightly black marks from forming on the sides of your candle holders.
To learn more about best practices for candle use, check out our FAQs. To stay up-to-date on all things candles, follow NCA on Instagram.